Showing posts with label Color Me Crafty. Show all posts

Tuesday, June 24, 2014

DIY Paper Wall Art


Paper crafts are really my most favorite thing. I could cut out and glue paper all day if given the chance! We recently moved one of our gallery wall pieces to a different gallery wall leaving a gap so I used some fancy paper from Paper Source and a dowel I had from a big fail DIY project I tried earlier this month to create a geometric wall art piece. It probably took me longer to pick out the papers than it did to do the whole project!


DIY Paper Cut Out Wall Art
You'll need:
Decorative Paper
Cut Out Form
Scissors
Thread or fishing line
Clear Tape
Dowel (either wood or metal)
Wall Hooks or Screw Eyes

How to:
Download and Print out the Hexagon form (available here) or create your own stencil. Trace out your form along the back of the decorative paper and cut out traced pieces. Layout pieces in desired pattern. I used two different papers and each had uneven edges. For a few of the shapes I layered two pieces of paper to show off the uneven/natural edges of the papers I used. If you do this, then adhere the layers together before moving on.

Cut thread into strings 2x longer than paper pieces. Tape string along the backs of the paper columns leaving excess at the top. Align dowel at top of columns and tape string in a loop around the dowel. Install dowel and columns of paper on desired wall using wall hooks or screw eyes.

Monday, May 5, 2014

Last Minute Cinco de Mayo DIY


Cinco de Mayo being on a Monday, and the Monday after Derby festivities no less, means you probably do not have a giant bash planned.

You can still get plenty festive tonight by stopping at the grocery store on the way home. I've got a DIY that is so easy I can't believe I haven't shared this before! You'll need some kitchen twine (or any other string/yarn you've got) and a packet of dot stickers of garage sale fame. If you haven't got any margarita mix or tortilla chips and salsa grab them while you're picking up the stickers and you're all set!


All you do is put one dot sticker on each side of the string so they stick together (if you get bigger stickers you can do half moon folds like this DIY from O-K-E-R). 


Happy Cinco de Mayo & Monday to you all!

P.S. don't forget to enter to win a DavidsTea spring set... you might need a cup of tea tomorrow to help nurse your margarita endued headache!

Wednesday, December 11, 2013

Color Me Crafty - Holiday Mantle Banner


If I could, I would play Arts & Crafts all day long.  I absolutely love creating and experimenting and I find it tough to control myself this time of year.  (Note: at the moment I'm writing this I'm looking at the top of my tree and trying to figure out what to make as a tree topper!)

Thursday, December 5, 2013

Color Me Crafty - Christmas DIYs + Our First Refinery29 Feature!

via Refinery29


Sometimes making a list and checking it twice is about all a gal can handle this time of year.  But for some, that list has a whole slew of crafty, DIY projects!  (Confession, mine usually does)

Wednesday, November 27, 2013

Color Me Crafty - DIY Wine Tags

Color Me Styled - DIY - Wine Tags

In case you're like me and don't think of these things until the last minute... here's the DIY for wine glass tags!  You need a paper bag, some tissue paper, tape (double sided if you've got it) and baker's twine.

Tuesday, November 12, 2013

Color Me Crafty - DIY Night at Langford Market Diversey + A Giveaway!!


Color Me Crafty!
Updated!!
Here's some snaps from Wednesday Night's Event!  Kelly (in the top right pic) won the first set of glasses but you can still win a pair by entering below!
 
Good luck!
-------------------------------------------------------
 
Calling all my Chicago Crafters!!  I would love to see you tomorrow night.  We'll be making some wine glass markers for Thanksgiving, sipping wine together, and shopping Langford Market's adorable pieces!  Plus I'll be giving away these two hand-painted wine glasses from Sara of Project Soiree.


So adorable right?

But I know all of you lovely readers won't be able to make it tomorrow.  So I've got a chance for you to enter to win the glasses and a set of 6 wine tags!  Tweeting about the giveaway, liking Color Me Styled on Facebook, leaving a comment below about your Thanksgiving plans, and following me on Instagram all get you chances to win!


The giveaway is open between now and Monday, November 18 at midnight and I'll announce the winner on Tuesday, November 19 when I also post the how-to for the wine glass tags. 

Good Luck!!

Tuesday, October 29, 2013

Color Me Crafty - DIY Wine Tag Event


In two weeks I'm hosting another craft night at Langford Market on Diversey.  And with all the meals coming up (Thanksgiving, Friendsgiving, Cookie Exchanges, Christmas Eve, Christmas, Tuesday's) there will also be a lot of wine.  And with a lot of wine comes the chance that you'll mix up your glass with someone else's.

Friday, August 30, 2013

Color Me Crafty - Back-to-School DIY Night in Chicago


TGIF!

Hopefully you've got a whole long weekend of funtivities planned for yourself this weekend!  And, hopefully you're ready to rock your summer whites one last time.  While Labor Day might mean the end of summer, it also means that it is Back-To-School time!

There is a promise that comes with September; new classes, old friends, and a lot of supplies to help usher in the new academic year. 

To celebrate the new school year, Fall, and, most importantly, because crafting is fun I'd like to invite you to a DIY night at Langford Market Boutique in Chicago.

I'll be on-hand from 5 until 8 with a school themed DIY and you'll be able to preview Fall fashions perfect for everything from the office, to the dance floor.  We'll also have a jewelry giveaway, snacks, and sips!

Please RSVP on Facebook by Monday (it isn't necessary, I just want to make sure I have enough supplies). Color Me Styled Back-to-School DIY Night

Enjoy your weekend and hopefully I'll see you on Wednesday!

Thursday, August 15, 2013

Color Me Trendy - Gallery Goodness


Spend more than 3 minutes on Pinterest lately? Then you've probably seen a gallery wall or four.

I've been a fan of gallery walls for years. My high school bedroom had bright blue racing stripes with a gallery of post cards, small prints, and cards all in infinity/floating frames. I'd die for pictures of it. Alas, I wasn't blogging in high school so it never dawned on me to document it!

But now I'm all grown up with an apartment of my own (okay, our own) and the gallery wall has been re-incarnated. Again the collection is in the bedroom but this time it is more personal, more sophisticated and much more subtle.

A few of my favorite things


Gallery walls are a way to show off your favorite things in one place. Our gallery wall is our favorite quotes and sayings and pictures of us and our families.

The staggered shelves and having one piece on the dresser help to create focus in a large space but still fills the large wall without feeling busy. I'd say, unless all of your images are the same size, staggering and layering your pieces is the best way to make your gallery wall look cultivated but not too perfect. This way you can swap out pieces whenever you want!


My gallery images are all different sizes and so I created some symmetry with my books. I've stacked them to create a solid block that is about the same height as the drawer/shelf that holds my necklaces and our alarm clock.

Looking at the picture now I wish I would have stopped for a bouquet of flowers for that Waterford vase I keep on my dresser!


Tuesday, July 30, 2013

Color Me Crafty - Chic Coasters


Coasters were never big in our house growing up. Until we redecorated the family room and fresh, new tables arrived. Then coasters were essential.

Then came college when coasters were a fun girly accessory for our apartments but rarely used.

Tuesday, July 9, 2013

Color Me Styled - CMS Turns One!!


Oh, they grow up so fast don't they?! 

Tomorrow will be Color Me Styled's first birthday. It has been such a fun year and I can't wait to keep this baby rollin.

Thursday, June 20, 2013

Color Me Thrifty - The Bar Shelf


Bar Carts are all the rage of Pinterest and for most blogger home tours out there. But it always seems these adorable drink stations cost an arm and a leg. Not wanting to be left out I set out to create our own version... for less than $100!

It starts with getting a good cart / shelf. I found mine from Urban Outfitters for $60 including shipping. Then we asked what color you think we should paint it (since the yellow didn't fit with our color scheme). Global Blue was the winner and it looks fabulous!


The only other piece we needed was a wine rack element and we found the perfect one from Pier 1 Imports for $12.  It is actually stackable so when we eventually build a wine cellar we've got a starting piece. 


Then it was a matter of bringing everything into one place. Our cocktail and party books, the bottles of booze and the cocktail napkins and umbrella straws all made their way over. A small box labeled "misc" holds decks of cards, dice, and a few spare ping pong balls. Our travel sized poker set fits nicely along side our hand-painted Dayton Flyers wine glasses and our decanter. And, finally the humidor (cigar box) has found a home.


Since booze bottles come in all shapes and sizes it is easy to arrange them in an attractive way while also making sure they're each identifiable. We propped our favorites out front (remember Hendrick's from the French 75s?) but it is easy to pick out the others.

So, it is possible to have a bar cart for under $100* you just need to be a little creative. Up-cycle old shelving or bedside tables, check out local thrift stores or antique markets and shop your house. Little jars or bowls can be repurposed to hold straws, matchbooks or wine glass tags. The most important thing is that it is a useful space for you!

*Liquor store bill not included... throw a "stock the bar" party and ask your friends to help you complete your selection.

Wednesday, April 10, 2013

Color Me Thrifty - Bar Cart on a Budget

inspiration images via Pinterest | Urban Outfitters Shelf

It seems like everyone has a bar cart and I hate to be the one left out... but I don't have a spare $600 for the Society Social cart that I desire. I never advocate for knockoffs. But I do advocate for getting what you want at a price you can afford.

Enter the Urban Outfitters Tulip Shelf which is unfortunately now out-of-stock but the Urban Outfitters has a lot of good, affordable options is an excellent alternative. (As is the IKEA VITTSJÖ if you have room to go vertical. 

Now I really do like the yellow the only problem is that all of our furniture is essentially in one room (aka loft living) and unless I get all new furniture (an option sidelined by Danny pretty quickly) the yellow has to go.

Here's where I need your help. The bar cart / shelf will be in a corner on its own but will be in the eye line of our grey West Elm Henry Chair and a pistachio slash leaf colored love seat. We also have a black sideboard from Crate and Barrel, a black and chrome dining set from IKEA and a grey shelving unit from CB2 in the space.


I want the cart to add a pop of color but don't want it to draw attention. I've decided that a blue is a good choice but now I need your help picking from Ocean, Iris or Global Blue. 

Whaddya think? Which one should I go with? 

updated: the winner was... Global Blue! 
See the finished product here: Color Me Thrifty - The Bar Shelf


Thursday, February 14, 2013

Color Me Styled - Happy Valentine's Day!!

Valentine's Day e-card from Paperless Post


I am sporting my only pink shirt today to the office and actually wish that I had a big sparkly heart pin from Ban.do! Typically I don't get into this holiday but I've decided to embrace the spirit and spread cheerfulness of today.

Since I didn't plan far enough ahead to actually mail valentines out to family and friends I'll be sending several ecards from Paperless Post!

Paperless Post has a darling selection of Valentine's Day cards as well as greeting cards, invites and personalized stationary to meet your every e-greeting need! I found several favorites that lucky Valentine's of mine will be receiving today.

To send your own hop over to Paperless Post!


And, Happy Valentine's Day!!


Thursday, February 7, 2013

Color Me Crafty - New Love for Valentines

Chews to Love - Image via IHOD

I'm not sure when exactly I fell out of love with Valentine's Day. I never had a traumatic dating experience that has scared me for life (or it scared me so bad my mind blocks it) and I've never been outright bitter towards the day. 

Maybe I just think that too much significance and pressure is put on this one holiday dedicated to love and affection. 

At any rate, I am starting to change my mind towards February 14th. And most of the credit goes to Pinterest and the delightful DIYs I've found there!

The first is the Chews to Love by Anna at In Honor of Design. She has these darling printable wrappers that just get glued to trident brand gum packages. So easy, so affordable! 

Matchbox Valentines - Image via Camille Styles

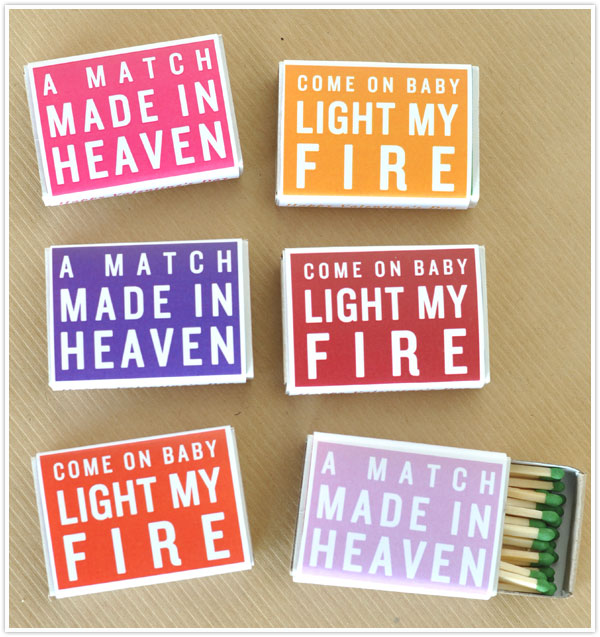
The second is another simple print and glue project for Matchboxes from Camille Styles. These would be a great gift to give out at the office since matches maybe are not the best for grade schoolers.


You Rule Valentines - image via Thompson and Spring

Finally these You rule Valentines by Thompson and Spring are completely adorable. They seem easy enough to assemble too!

What are your plans for Valentine's Day? Danny recently said, ever so frankly; "We're not doing anything for Valentine's Day, right?" Lucky for him I was glad to hear I didn't have to worry about a card and a gift and we will most likely spend the evening at home, in pajamas, watching hockey. 


Thursday, October 11, 2012

Color Me Crafty - Floating Frame Accent Wall


Living in Chicago rental units can drive a design fan crazy. All day I see these amazingly designed homes on Pinterest or on a variety of blogs and then come home to my apartment and want to re-do everything. So when friends of mine move I am eager to see how they design their new spaces.

To be budget, and lease, friendly. Katie put together this great DIY project for her new walls.


It was as simple as finding wooden or plastic frames from the bargain bins at the dollar store or the craft store. You can have as many as you like! Then select acrylic paint colors that fit the decor you already have in your room. Depending on the number of frames you can use 1-5 colors as long as it doesn't get too Rainbow Brite! Use foam brushes because they're easiest to work with on a variety of surfaces. 


Then there is no great science to a frame collage. These were hung without their glass on the wall using two nails on the inside of each corner. Check the leveling... iPhones have an app for that. Or if you're old school like me... just use a level! 

The best part is that you can start small with this project, live with it for a few days and if you decide you need more frames they're easy to add!

And, you can easily change up the location of the frames whenever you want for a bit of a change. On Katie's wall right now, none of the same color frames are next to each other... a new layout would be to group them all together by color or size!


Tuesday, September 18, 2012

Color Me Crafty - Tissue Paper Mosaic DIY


Ever since I was young I loved having art work to hang on my walls. And yes, I am counting N*SYNC and JTT posters as art.

As I matured I found myself liking actual art work but not liking the costs. It seems as soon as I found the "perfect piece" for the bedroom, bathroom or office it would be hundreds of dollars out of my budget.

D-I-Y to the rescue!

Doing It Yourself is the perfect solution. You can customize the color scheme, size and use less expensive materials to keep your costs low. This is exactly what I did for our bedroom.


Our bedroom is an internal room with no windows so it had to be something kind of light but still pull in the colors from the room. So I came up with a gold and blue two piece Moroccan style design using tissue paper, spray paint and a glue stick.

You'll need:
1 or 2 canvases in any size - or you can use a cardboard box or piece of plywood
spray paint (1-2 cans depending on the size of your canvas / cardboard / plywood)
printer paper (2 sheets - for your stencil)
tissue paper (3-10 full size sheets depending on the size of your "tile" and canvas)
glue stick (or spray adhesive)


Procedure:
Spray your canvases with the spray paint. The best method is to go in a diagonal line back and forth across the surface. Apply one even coat and let it dry before going back for a second or to touch up any light areas.

While the canvases are drying completely create your tile stencil. If you are going for a symmetrical look use the old "snowflake" trick and fold your piece of paper in 4ths and draw your shape and cut. At the very least fold your paper in half so that each side is symmetrical.

Fold tissue paper into squares or rectangles, trace the stencil on the top piece and cut out carefully. If you notice that the tissue paper is slipping and your cutting unevenly, try a smaller stack of paper. You should be able to do 6-10 at a time.


Decide on your pattern. I chose a chevron style with the two colors having the lighter one be more prominent. I laid it all out to make sure I had enough tiles to fill both canvases. 

Get gluing! Tissue paper, if you remember from grade school, is sensitive so I suggest starting near the middle of the tile and gently applying glue to the edge. You can apply the glue on a scratch sheet of paper to avoid excess glue getting onto the canvas. If you rip the tissue paper try to apply it anyways, it'll add a bit of character to some of the tiles. Unless you have a ton of extras... then toss it! 

Let the canvases and tissue paper dry for an hour or so and then go back and see if there are any corners that didn't get enough glue and touch it up. You may find using a toothpick and kind of rolling it on easier instead of peeling up the tiles and trying to apply glue directly. 


Let it all dry. Decide if you want to see the raw edges of the canvas or cover it with ribbon or washi tape or trim your tiles so they don't show on the edge. 

Hang it up and enjoy!

Friday, August 10, 2012

Color Me Crafty - Ombre Walls

Teacher always said sharing is caring and we care so much about all of you that we just had to share this DIY post from Erica Domesek of P.S. – I made this… that was featured on Rebecca Minkoff's blog "Minkette - for the downtown romantic" and is making its way around Pinterest like mad. 

If you don't follow Erica's blog you're missing out - she does awesome DIY projects and always shares the inspiration board for it too.

Also fitting that Color Me Styled posted the ombre nail post this week and Editor Erin got her ombre locks touched up yesterday. We'll snag the details on the hair style and how to ask your stylist for it from our hair expert Kate later this month!

And, we agree that we want the rug, pouf and table. And how cute are the hanging hats!?

TGIF!


DIY Ombre Wall with P.S. – I Made This

The ombre look is a trend that took the fashion world by storm starting with hair and working its way to nails, clothing, accessories and beyond. Now it’s made its way to interiors thanks to Erica Domesek of P.S. – I made this…
This sea foam green / mint color has been equally as captivating. It’s an absolutely gorgeous accent for any time of the year, and this ombre wall by Erica is as eye-catching as it is peaceful.
Now all we need are some Rebecca Minkoff painter’s overalls to get started (joking). But in all seriousness, we kind of want that rug and Moroccan pouf too (added to the wish list!).
(Minkette Blog Post here)

Wednesday, August 1, 2012

Color Me Styled - Hostess Gift


The time comes in every woman's life when she is called upon to host a wedding shower, baby shower or graduation party. There are the invites, the favors, the venue, the menu and any games to plan and then you've gotta look pulled together and chit chat with everyone who attends.

Oh, and you need to give a gift.

For a lot of these events the lady of honor will be registered but there is something about opening a surprise gift that makes the day more special. Add in a super thoughtful element and your event will rank among the favorites for years to come. So, in addition to your "Cooking for Two" or "Mute Button Binkie" there is a gift that takes it to the next level.

What is this thoughtful gift? (And, I can't believe I am sharing this secret with you) Thank you cards. 

Since you invited the guests you've got the list of names and addresses. Pick up some stamps and fill in the return address and all the bride / mom to be / new grad has to do is add her personal note!

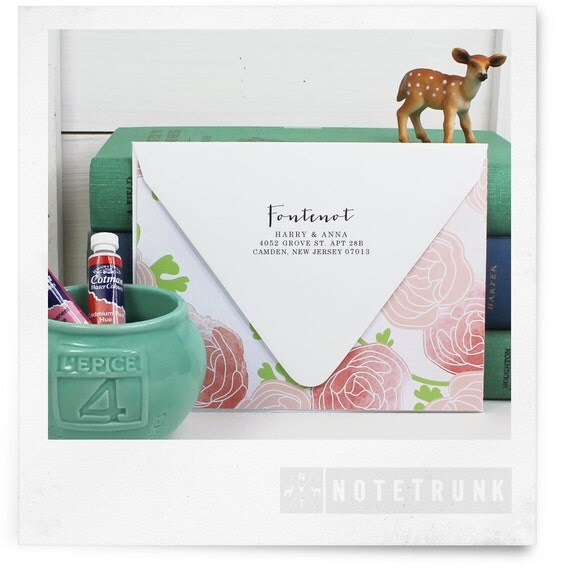
For added fun order a custom address stamp from Etsy (this shop is our favorite) and include that in the gift.

Notetrunk on Etsy


Tuesday, July 31, 2012

Color Me Crafty - Bracelet to Necklace DIY

With all the hype about Arm Candy and Arm Parties out there now it might surprise you that we are doing a necklace DIY but let us explain.

Some bracelets just don't fit. 

They're either too big and go sliding all over the place, or too small and don't get along with the other Arm Party goers. (Every party has a pooper and all). Or, like the case for the particular bracelet in today's post... the clasp wouldn't stay closed.


You will need:
A bracelet (not a bangle)
A needle nose pliers
A length of chain - depending on how long you want your new necklace to be (ours is 14-16 inches)
Jump rings (4-6 at a minimum)
A lobster closure or another clasp of choice


Remove the original clasp, save it for later if you want but since ours was unreliable we pitched it.

Center the bracelet on the length of chain and attach with jump rings at end and in the middle. If you want more of a cluster pendant look you can use the jump rings to gather the bracelet together before it is attached to the chain.

Finish the necklace with the new clasp.


And, don't stop here! Did you loose one earring at the bar last weekend (we've been there) just attach the other to some chain or some thread for a great little layering piece. Cocktail rings too big or too small... same deal. 
You should probably draw the line at buttons before this gets more Craft Fair than Happy Hour. 


Pin It button on image hover